Thursday, January 2, 2014


NEW! Ultra-high speed scanners (up to 1 million points/second) are known for their ultra-fast scan speeds and often higher level of detail. To this, the break-through, compact Leica ScanStation P20 also brings unprecedented data quality at range (120m, max), plus outstanding environmental capabilities, survey-grade tilt compensation, and an industry first "Check & Adjust" capability.
With "Check & Adjust" users can electronically check the accuracy of their instrument and adjust it themselves to ensure the highest level of performance, without having to send it to the factory or service center.

 Watch Leica scanning videos:


Wednesday, December 4, 2013


Imagine what you could do with an integrated design suite. Impress your clients with cinematic-quality rendered animations and win more business. Save time by integrating design workflows, rendering faster and digitizing scanned drawings. Eliminate redundant manual drawings and create inspirational freehand sketches right in AutoCAD®.


With Autodesk® design and creation suites, you can create, capture, connect and showcase your designs like never before. Eliminate creative constraints and unlock new design possibilities, with all the tools you need, exactly when you need them.


Try it for yourself – purchase Autodesk design or creation suites before January 24, 2014 and save up to $1,000. This offer also applies to purchases of AutoCAD products, including existing customers looking to add new licenses.


Don’t miss out, visit http://sterlingsystemsusa.com/promotions now to grab this great offer now.


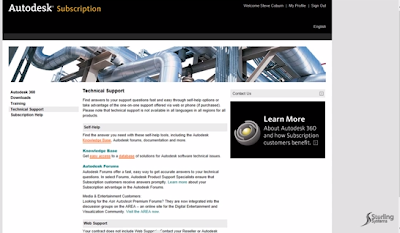
Accessing Autodesk Subscription and Autodesk 360 


Learn how Autodesk 360 expands software capabilities beyond the desktop with powerful cloud-based services that help streamline workflows and unlock new ways to innovate. There are amazing and helpful tools available within the Autodesk 360 website watch now.


Wednesday, November 13, 2013

Win a 7 Day Cruise!*


Sterling Dream Cruise - the perfect reward is waiting for you!


Sterling Systems is inviting three lucky winners and a guest to enjoy an exciting seven day cruise from Los Angeles to Puerto Vallarta, Mazatlan and Cabo San Lucas. Dream Cruise Sweepstakes runs from November 11, 2013 until January 24, 2014.*

The Carnival Miracle cruise is the perfect vacation for seven days of pampered pleasure. From the crystal-clear waters and sparkling nightlife of Puerto Vallarta and La Paz, to the energizing fun of sport fishing and shopping in Mazatlan, this vacation inspires a feeling of privilege. Needless to say the beaches and underwater scenery of Cabo San Lucas are astonishing and should not be missed.

 Dream Cruise Sweepstakes runs from November 11, 2013 until January 24, 2014.*
With every $ 1000 you spend you receive a chance to win.*

 Enter early from November 11, 2013 until December 15, 2013 and receive double entries!*

All purchases qualify including software, subscriptions and training.
 Each Grand Prize package includes airfare, transfers and a cruise sailing in February, 2014.


NO PURCHASE NECESSARY TO ENTER OR WIN.  Ends 1/24/14, subject to Official Rules available at http://www.sterlingsystemsusa.com/cruise2014rules. Open to legal residents of AZ, MI, OH and NM, at least 18 years of age at time of entry. Must be employed by a company that performs design or survey services for the architectural, engineering, mechanical engineering or construction industries (“Company”) and must be authorized to enter Sweepstakes on behalf of Company.  Void where prohibited.  


Tuesday, October 1, 2013

October Tech Tip!

Using the Revision Cloud and the Schedule!


Here is one for you guys out there looking to learn something about the Revision Cloud command in Autodesk Revit.  This will be the same in all versions of Revit and past releases.

I briefly discuss the purpose and use behind the revision command and why it should be done the way it was created.  If you have any comments please post them below.

Click on this link and it should take you to our YouTube channel.


We at Sterling Systems can help you with your technical issues and your business needs.  Just give us a call at (480) 719-4599 and we’ll be happy to assist you!

Steve Coburn, Applications Engineer

Monday, September 2, 2013

September Tech Tip!

Working with Annotative Elements!


Well, welcome to another tech tip from Sterling Systems!

I'm glad you could join us as I talk a little about how the Annotative Elements such as text, dimensions, multi-leaders, hatch and blocks can help us save time and effort while producing our projects.


I hope that you have found this useful and I have cleared up some of the mystery of Annotative Elements and their use in today's workflow.

if you can't get the video to play, you can find the link here on our YouTube channel.


We at Sterling Systems can help you with your technical issues and your business needs.  Just give us a call at (480) 719-4599 and we’ll be happy to assist you!

Steve Coburn, Applications Engineer

Friday, August 2, 2013

Civil 3D to Revit

Civil 3D to Revit and back!

Okay guys, I know that it's not technically a tech tip, but I know that we market to a lot of Civil engineers and Architects, so I wanted to get this bit of information out there to those of you who want to collaborate on a better playing field with your Civil and Architect friends.

This is a great video/class presented by the CAD Technology Center at the University of Minnesota.  Props to the presenters, Brian Levendowski and Shawn Zirbes, for diving in and working this out plus allowing us to see their work.

This has always been a sticky subject when it comes to the Civil project data melding with the Revit Architectural project.  What you have to remember, and they state it several times, always follow the process.

Click here to see the video on YouTube.  It is a bit long as it is a breakout session and demonstration at 1:38:09 so be prepared to spend some time with it.  It is well worth the time if you're looking to make the workflow better.  Software being used in demonstration is 2014 releases.

We at Sterling Systems can help you with your technical issues and your business needs.  Just give us a call at (480) 719-4599 and we’ll be happy to assist you!

Steve Coburn, Applications Engineer

Thursday, August 1, 2013

August Tech Tip!

AutoCAD Architecture Door Schedule!

In the past several months we have had some questions about the upgrading from ACAD LT to regular AutoCAD 2014 and to AutoCAD Architecture 2014. In these conversations we would discuss several of the options that you will receive if you do the upgrade.  One of these is the ability to schedule the blocks within the project.  One of these items are doors.

Below I have put together a little video showing you how easy it is to work with the schedules in the program in using the AutoCAD Architecture 2014.  You will see as well that this will also work with windows and rooms.


If you are having problems viewing the video, please click here to watch on our YouTube channel.

We at Sterling Systems can help you with your technical issues and your business needs.  Just give us a call at (480) 719-4599 and we’ll be happy to assist you!

Steve Coburn, Applications Engineer

Monday, July 1, 2013

July Tech Tip!

Sketchbook 2014 to Revit 2014!

Use the program Autodesk Sketchbook 2014 to quickly draft your ideas in a 2D representation much like you would on a napkin at the meeting table with your client.  Take that info and transfer it to Autodesk Revit through the workflow of the .dwg file format and quickly start your design without having to redraw the original intent.  Now we have a process to keep information from being lost between the client meeting and the office process of inserting into CAD.


If you are having problems viewing this video, please click here to view it on our YouTube channel.

We at Sterling Systems can help you with your technical issues and your business needs.  Just give us a call at (480) 719-4599 and we’ll be happy to assist you!

Steve Coburn, Applications Engineer

Monday, June 3, 2013

June Tech Tip!

Parameter Order!


There are those of us out there that when we go to create parameters in our families that we want some organization to the list.  As you well know Revit does not alphabetize or numerically list our parameters.
If you have done any research on this you may very well know what I am about to talk about.  It’s a simple tool or key stroke called the “asterisk”(*,or star).

The first step you want to do in any planning is to PLAN!  Layout your parameters in the order you want them in.  Of course if you don’t know them yet then this will be hard to do, but let’s try to think ahead and plan on what we will need.

Let's start with the "Generic Model" in the family editor.

Basic Family type layout.


Second step is to create the family file right.

While we are creating the file, during this process we insert the needed parameters.  I want to say start with the last parameter on your list.  Want to know why?  Well during the creation of parameters the program likes to put them anywhere it wants to sometimes, most of the time right above the one you previously created.  There is not a definite pattern.  So . . . the asterisk, mentioned above, allows you to at minimum put in order the parameters you are using.

For example let’s put in our first parameter we’ll call it “Par A”.


Our next one is “Par B”, but we don’t want it placed above “Par A”.


So . . . we remove the “Par B” and we go modify the “Par A” and call it “Par B” then add another one called “Par A”.

This is the simple method of doing things, with a couple of extra clicks that we did not want to do in the first place, right?  But what happens when you go changing and adding other names that start going under and above the ones already listed?

Well, the trick is to select the parameter that is right below the one you want to add and modify it.  In the name of the parameter add an asterisk(*,or star) before the name, copy the entire name and add a new parameter.

Paste the copied text into the name field, add another character to the end, making it different, make your choices for the data type and then hit ok.  You should see something like this.


As you can see I wanted to add the “Par A2” below the “Par A” and it would not allow me.  What I did was add the asterisk to the “Par B” added a 2 behind the new one and it automatically put it above the old “Par B” parameter.  Now what you would need to do is delete the Par A2 and rename the “*Par B2” to “Par A2”.  Of course go back and modify the original “Par B” to take out the asterisk and you’re all set.

So you should be seeing something like this.


Remember previously I said to plan your list, this is where you will need to do as much as you can, because it will go very quickly if you do all the copying and renaming first before you start adding formulas and the parameters to the geometry.  Simply keep adding the same parameter and adding more characters to the end to keep them in order as such:

After Renaming
Before Renaming


So while this was a very simple example it can be used in the most populated of families and their lists of parameters.

We at Sterling Systems can help you with your technical issues and your business needs.  Just give us a call at (480) 719-4599 and we’ll be happy to assist you!


Steve Coburn, Applications Engineer
Enhanced by Zemanta